When it comes to business process management, it’s important to understand the terms program and project. Program is a larger umbrella term that refers to a common goal for multiple projects within a portfolio. A program is a term that refers to a common goal for multiple projects within a portfolio. A project, on the other hand, represents a smaller segment of a program. Understanding the dynamics of programs and projects is the key to effective management and goal alignment.
| Program | Project |
|---|---|
| Longer life cycle | Shorter life cycle |
| Contains multiple projects | Contains multiple tasks |
| Impacts various processes | Impacts fewer process |
Initiating a Project
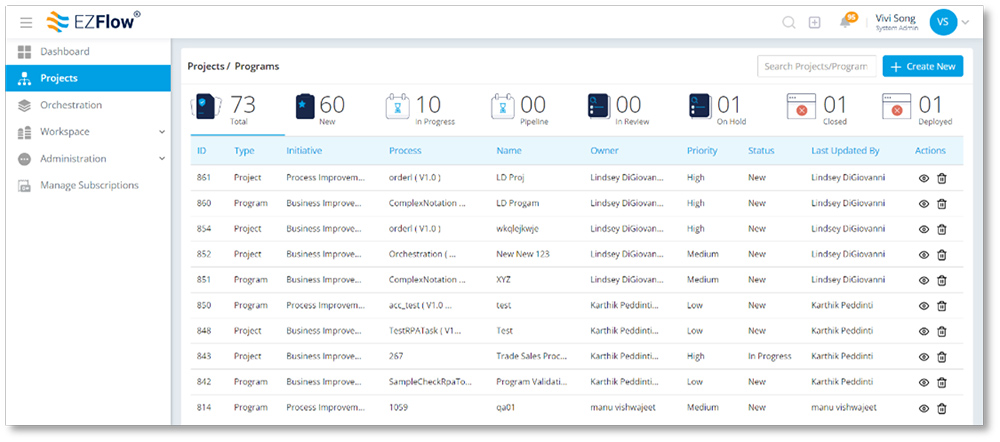
First, open the Projects module by selecting Projects from the left navigation. Once you’ve added projects to the platform, you’ll see them organized in a table when you open the module. This view can be sorted by clicking the sort arrows on the column labels.
Starting a New Project
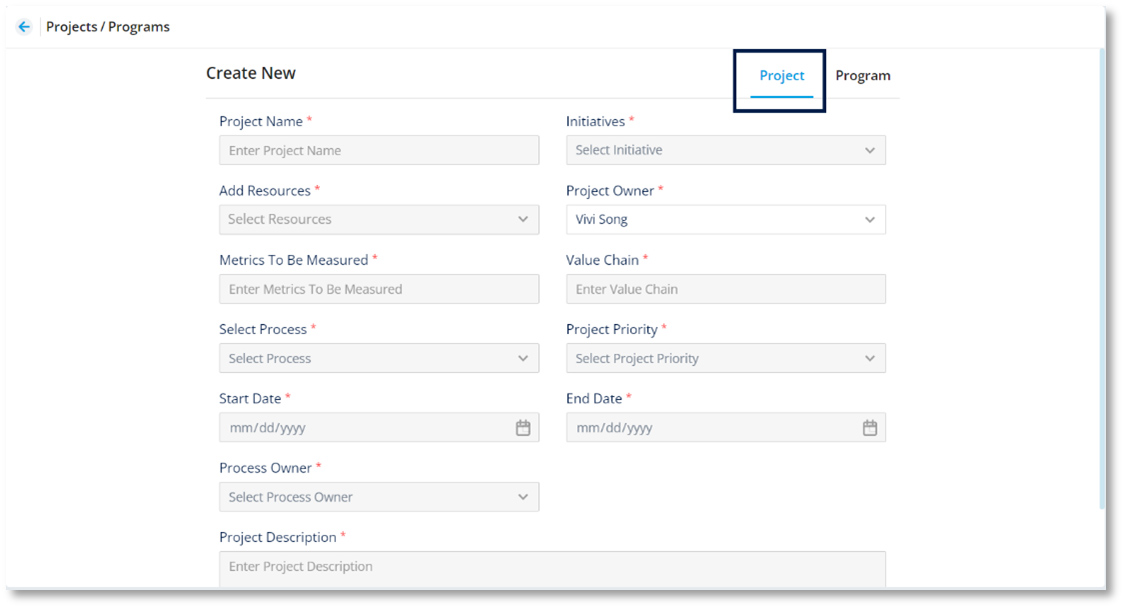
- Click Create New

- Be sure the Project tab is selected
- Fill in the fields accordingly, assigning ownership where needed
- Click Save in the bottom right corner (Note: If any fields are left empty, you will be unable to save. To make changes to a field you’ve entered, click Reset.)

- Your project is now created

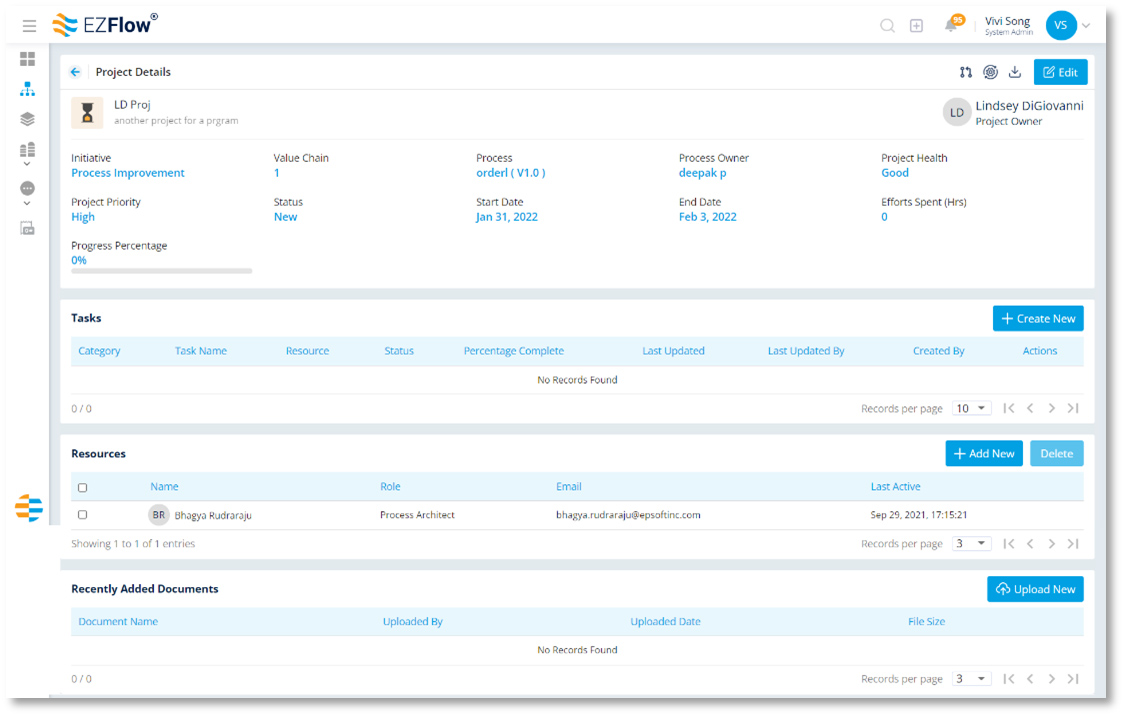
Once you’ve created your project, you’ll need to add the project details.
From the Project Details screen, you can create tasks, add resources (assignees), and upload relevant documents.
Creating a Task Within a Project
- Click Create New within the Task window
- Fill in the fields accordingly, assigning ownership where needed
- Click Save in the bottom right corner (Note: If any fields are left empty, you will be unable to save. To make changes to a field you’ve entered, click Reset.)
- Your task is now added to the project and will show as an entry in the Task window
From the Task window, you can upload files to your task, edit, delete and view your task by clicking the icons in the Actions column.

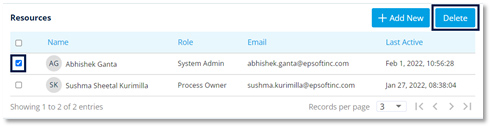
Adding a New Resource to a Project
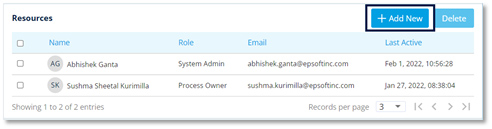
- Click Add New within the Resource window
- Select your resource(s) from the drop-down
- Click Save in the bottom right corner
- Your resource(s) is now added to the project and will show as an entry within the Resources window
To delete a resource, simply check the box of the resource to be deleted. Click Delete and confirm your selection.
Uploading Documents to a Project
- Click Upload New within the Recently Added Documents window
- Select your resource(s) from the drop-down
- Click Save in the bottom right corner
- Your document is now added to the project and will show as an entry within the Recently Added Documents window

Initiating a Program
Unlike a project, a program represents a larger, overarching common goal for multiple projects within a portfolio. Programs have longer lifecycles and multiple projects, and they typically impact multiple processes across the enterprise.
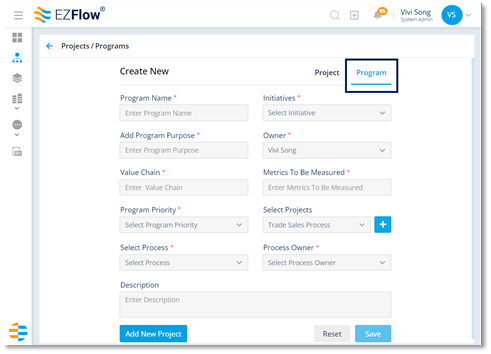
Starting a New Program
- From the Projects module screen, click Create New
- Be sure the Program tab is selected
- Fill in the fields accordingly. To add multiple projects, select one project at a time from the drop-down, and click the create icon to add. Only the most recent selection will show in the form field, but all selected projects will appear on the next screen.
- Click Save in the bottom right corner (Note: If any fields are left empty, you will be unable to save. To make changes to a field you’ve entered, click Reset.)
- Your program is now created
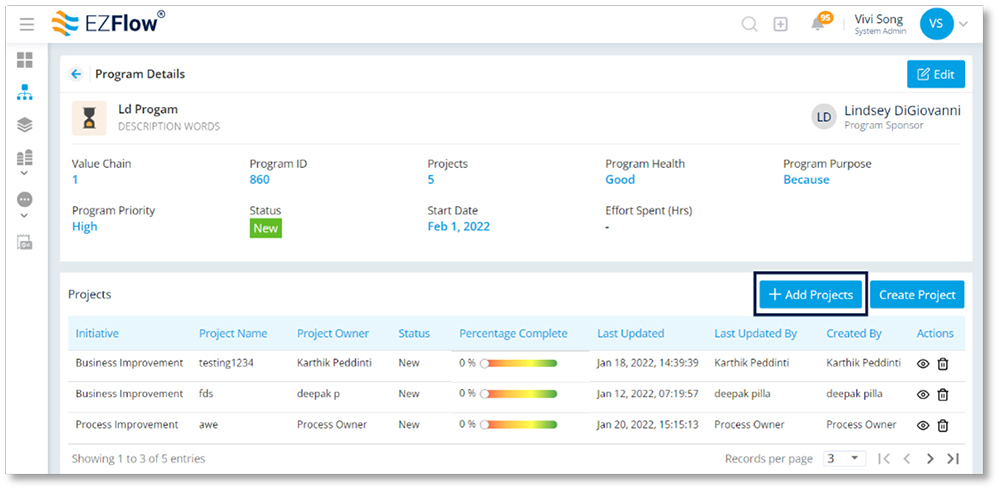
Once you’ve created your program, you can edit it by clicking the Edit button in the top right corner of the Program Details window. You can also view and delete existing projects within your program, add new projects, and create new projects right from the Program details window.
Adding an Existing Project to a Program
- Open your program (from the Project module launch screen, find the program you want to modify and click the view icon)

- Click Add Projects
- Select your project(s)
- Click Save
- Your project(s) will now appear in the Projects window of your program

Creating a New Project for a Program
- Open your program (from the Project module launch screen, find the program you want to modify and click the view icon)
- Click Create Project
- Fill in the fields accordingly
- Click Save in the bottom right corner (Note: If any fields are left empty, you will be unable to save. To make changes to a field you’ve entered, click Reset.)
- Your project is now created and will appear in your list of projects within your program
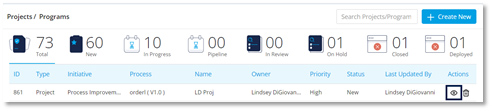
You can view and delete your projects by clicking the icons in the Actions column. See Initiating a Project for more details about editing projects.